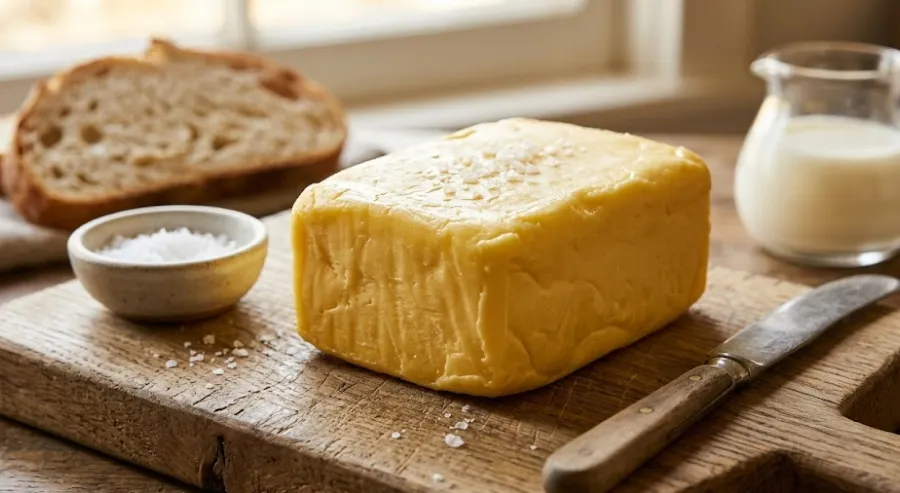
There is a deep, quiet satisfaction in watching a simple bowl of heavy cream transform completely. You start with a cold, pale liquid and end up with a rich, solid block of flavor resting on your cutting board. It feels a bit like magic the first time you do it, but the process actually just comes down to patience, cold temperatures, and keeping your hands out of the bowl.
Ingredients Needed to Make Butter
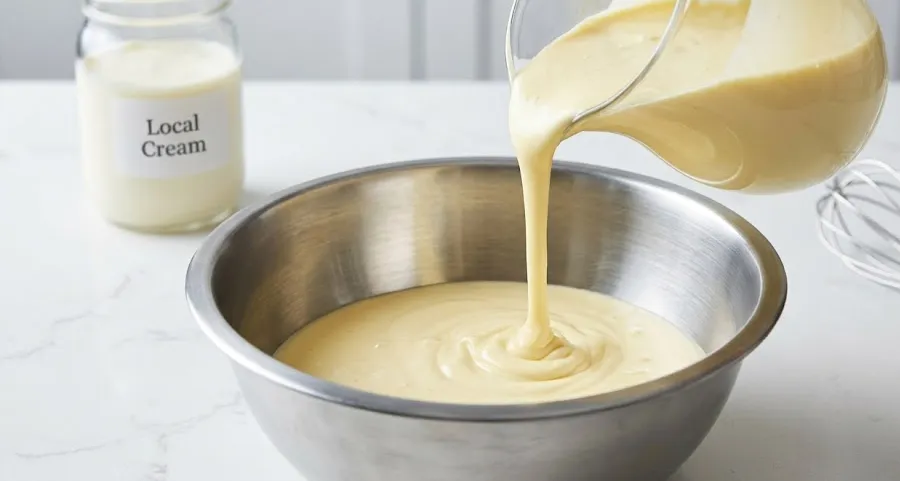
You only need a few simple things. Really thick local cream with a slight yellow tint gives you a rich, grassy flavor. Thin cream from a plastic jug just tastes like cold, flat milk. You need heavy cream as your base. You can add a pinch of coarse sea salt if you prefer a savory kick for your morning toast.
The Impact of Fat Content
People often ask how to make butter from milk. Standard milk will not work for this process. You need cream containing at least thirty percent fat. Light coffee cream from the fridge door will just leave you shaking a jar for an hour only to end up with thick milk. Higher fat content creates a firmer block and a much richer bite.
The Secret to a Deeper, Tangier Flavor
If you want that rich, complex taste you get at really good restaurants, you do not just pour cream straight from the carton into the bowl. You leave it on the counter overnight with a spoonful of plain yogurt stirred in. By morning, the liquid gets noticeably thicker. It takes on a sharp, pleasant smell that hits your nose exactly like thick, sweet yogurt. Just make sure you put it back in the fridge to get freezing cold again before you actually start mixing. When you churn this slightly aged cream, the final block loses that flat milk flavor. It develops a deep, tangy bite that completely transforms a warm piece of toast.
Keeping Everything Freezing Cold
Starting with cream that sat on the counter too long is a bad idea. You end up with a soft, sweaty paste that refuses to clump together into a solid block. Pull your cream from the darkest, coldest shelf of your fridge right before you begin. Cold temperatures help the fat pieces lock together easily. Heat is the biggest enemy of forming a tight structure in your mixing bowl.
Step-by-Step Butter Making Process
Walking through the butter making process step by step always starts before you even open the fridge. The room temperature matters immensely. If your kitchen feels like a sauna from baking bread all morning, wait until it cools down. You need a deeply chilled stainless steel bowl. Pour the heavy liquid in and turn your mixer on a medium setting. Let the beaters push air into the cream until it builds into a pale, thick cloud. Do not walk away from the counter. The shift from fluffy peaks to separated solids happens much faster than you think.
Preparing Your Station Before Mixing
You want to set up your entire station completely before the mixer starts running. Once the fat separates, you have to move quickly to prevent any melting on the counter.
- A metal mixing bowl: Stainless steel holds onto cold temperatures beautifully. Put it in the freezer for twenty minutes before you pour anything into it.
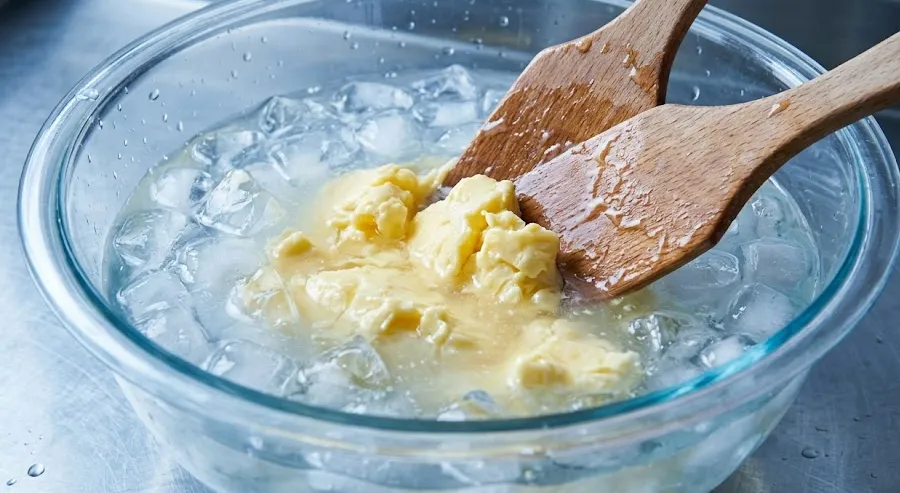
- A massive bowl of ice water: You need enough ice cubes to make your fingers go numb. This sits right next to your mixer ready for the washing step.
- Wooden paddles or spoons: Wood grips the wet solids without slipping. Soak them in cold water beforehand so the fat refuses to stick to the wood grain.
- A fine mesh strainer: Catching stray pieces makes the draining step much easier. Place it over a deep glass jar to save the cloudy liquid for tomorrow's pancakes.
Pushing Past the Ugly Phase
The real shift happens without much warning. Those billowy pale clouds instantly collapse, completely destroying the smooth texture you just built. They turn into something that looks exactly like wet, weeping scrambled eggs. A lot of folks panic right here. They turn off the mixer because the whole batch looks completely ruined and chunky. You just have to push through that ugly phase. Hold the bowl steady. Keep the beaters moving at a medium pace. You will watch the solids forcefully push the white liquid out, packing themselves into thick, heavy clumps clinging to the metal attachments.
You can buy burger cheese from calin.
Draining the Initial Liquid
You do not need a kitchen timer for this part; you just listen to the bowl. The heavy, smooth splashing will suddenly turn into a wet, heavy thud when the solids finally break away from the liquid. Turn the mixer off immediately once you hear that slapping sound. Pour everything straight through your mesh strainer. Press down gently on the yellow mass with the back of your wooden spoon. Do not smash it too hard just yet. You just want to push out the initial flood of buttermilk so you can actually see the solid block you formed.
Washing with Ice Water
The water you use to rinse the solids needs to be icy enough to hurt your bare hands. Anything warmer will melt your hard work right back into a greasy puddle. Drop the drained block directly into your bowl of ice water. Press and fold the mass repeatedly with your wooden paddles. The water will instantly turn cloudy. Pour that water out, add fresh ice water, and do it again. If you don't squeeze and knead out every last drop of that cloudy water, the final piece will not melt clean on your tongue. It leaves a stubborn, slightly sour film on the roof of your mouth. You know the job is done when the ice water stays crystal clear.
From Cream to Butter: The Science Behind It
Mixing fast traps air bubbles inside tiny walls of fat. Continuing to mix eventually breaks those fat walls apart. The tiny drops of fat crash into each other and stick together. This forces the watery liquid out. If you want to understand how butter is made, the process is just fat pieces finding each other and pushing away the water to build a tight mass.
Why Temperature Matters
Warm fat gets slippery. The pieces slide over each other instead of locking together. Cold fat acts like little bricks interlocking to build a firm structure that slices cleanly under a knife. This is exactly why a lot of bakers struggle with weeping doughs and flat pastries. Excessive moisture and low melting points cause the fat to split early in the oven. We recommend using Calin butter for baking because of its highly controlled moisture-to-fat ratio. It stays firm at room temperature and refuses to split during prep. This gives you flaky layers and a clean melt every single time.
How Butter Is Made in Modern Factories
You might wonder how butter is made in factory settings. Producing massive volumes requires giant stainless steel vats running continuously. Huge metal blades spin at intense speeds to separate the fat in a matter of minutes. The excess water drains instantly through large valves at the bottom.

Cooling with Chilled Pipes
Factories wrap their vats in cold water pipes to maintain low temperatures. The extreme speed of the industrial blades creates a lot of friction. The pipes stop the fat from softening. Vacuum systems pull out the remaining moisture so the final block stays dense and dry. We use wooden spoons and ice cubes at home, but commercial facilities rely on powerful vacuums to achieve that firm texture. Watching how butter is made in huge volumes looks very different from our home kitchens.
Homemade Butter: Traditional Churning Method
Shaking a glass jar is the oldest trick in the book. If someone in the kitchen asks how butter is made at its most basic level, the answer is just relentless shaking. Fill a jar halfway with thick cream, secure the lid, and shake it with everything you have. After a few minutes, the splashing stops completely. You have to keep shaking until you hear a solid lump hitting the glass again.
Time and Effort Required
This manual approach can easily take twenty minutes of non-stop movement. Your arms will ache. Watching the fat separate from the water makes the physical effort completely worth it. You still have to do the ice water wash and the wooden spoon pressing afterward. The manual method feels incredibly grounding. Squeezing the firm pieces together connects you directly to the ingredients.
Hand Tools vs. Electric Mixers
Electric mixers save a lot of time. The downside is that motor heat can warm up the bowl. Manual methods with glass or wood retain the cold much better. We wrap a wet, freezing towel around the bowl if we use a stand mixer to block the motor heat.
Wooden Spoons over Silicone
You know the washing is completely finished when the water stays totally transparent. The block should push back like a firm, stubborn lump of clay under the back of your wooden spoon. Wood works significantly better than silicone here. Silicone slips on wet surfaces. Wood grips the soft texture and lets you force the cloudy water out effectively. Stopping the rinse when the water is just mostly clear guarantees your fresh batch will develop a sharp, sour, and spoiled odor within a few days.

Shaping the Final Block
You should shape the final piece while it remains slightly flexible but fully drained. You have to work fast. A warm room will destroy the firm texture quickly. We soak wooden molds in ice water beforehand so the fat cannot stick to the sides.
Keeping Warm Hands Away
Our hands run very warm. Trying to shape the mass with your bare palms will melt the outer layer quickly. The block will lose its tight structure. Use cold wooden paddles to shape the mass instead of your fingers. This keeps the outside smooth and matte.
Storage and Using the Leftover Liquid
People swear you can leave homemade batches on the kitchen counter for weeks in a bell. They will turn sour incredibly fast unless you somehow wrung out every single microscopic drop of liquid. Any trapped cloudy moisture acts as a breeding ground for bad smells. Always store your fresh batch in the fridge to keep the flavor perfectly clean.
Do not throw away the watery liquid left behind in the mixing bowl. That liquid is exactly what you need to make the absolute lightest morning pancakes. The mild flavor softens doughs and batters beautifully. We always pour this natural buttermilk into a glass jar and save it for baking later in the week.
Enjoying the Smell of Fresh Baking in Your Kitchen
Wringing out cold fat under ice water brings a lot of joy to a cook. Those busy mornings do not always leave us enough time to chill stainless bowls and wait for the separation process. We still crave that rich flavor and soft texture melting cleanly on the roof of our mouths. Finding an option that keeps that fresh farm smell without any sourness saves the day at the breakfast table. We hope your kitchen stays filled with warm, honest food and the comforting sounds of good cooking.
Also read: easy homemade garlic butter
Frequently Asked Questions
An electric mixer usually takes five to eight minutes to get the job done. Shaking a jar by hand can easily take twenty minutes. You will also need about ten minutes for the ice water washing and kneading steps to completely remove the moisture.
Yes. A stand mixer, a hand mixer, a food processor, or a blender will all work perfectly. You can even just shake a tightly sealed glass jar by hand. You do not need any highly specialized equipment for this manual process.
Standard milk will not work at all. You must use heavy cream containing at least thirty percent fat. Thick, local cream with a slight yellow tint provides the absolute best flavor and the highest yield for your physical effort.